Frequently Asked Questions
Traffic & Vehicles Questions
Is this a traffic simulation where vehicles interact with each other and the environment?
You can easily animate cars on each road object individually, with adjustable parameters like density, seed, spacing, and speed. Each road object is based on a single curve.
However, this is currently not a full traffic simulation, as vehicles do not interact with traffic lights, intersections, or each other.
To animate cars moving through intersections, use the included 'Traffic Animation Asset'. This moves vehicles along a single curve while allowing you to adjust the same parameters.
Car wheels rotate during animation, but they don’t have suspension rigging.
You can also add a low-poly driver inside the cars through the settings.
Can cars drive on the left-hand side, as in the UK, Japan, Australia, India, …?
Yes! The direction of the cars can be changed per lane.
Can I use my own collection of cars?
Yes, you can!
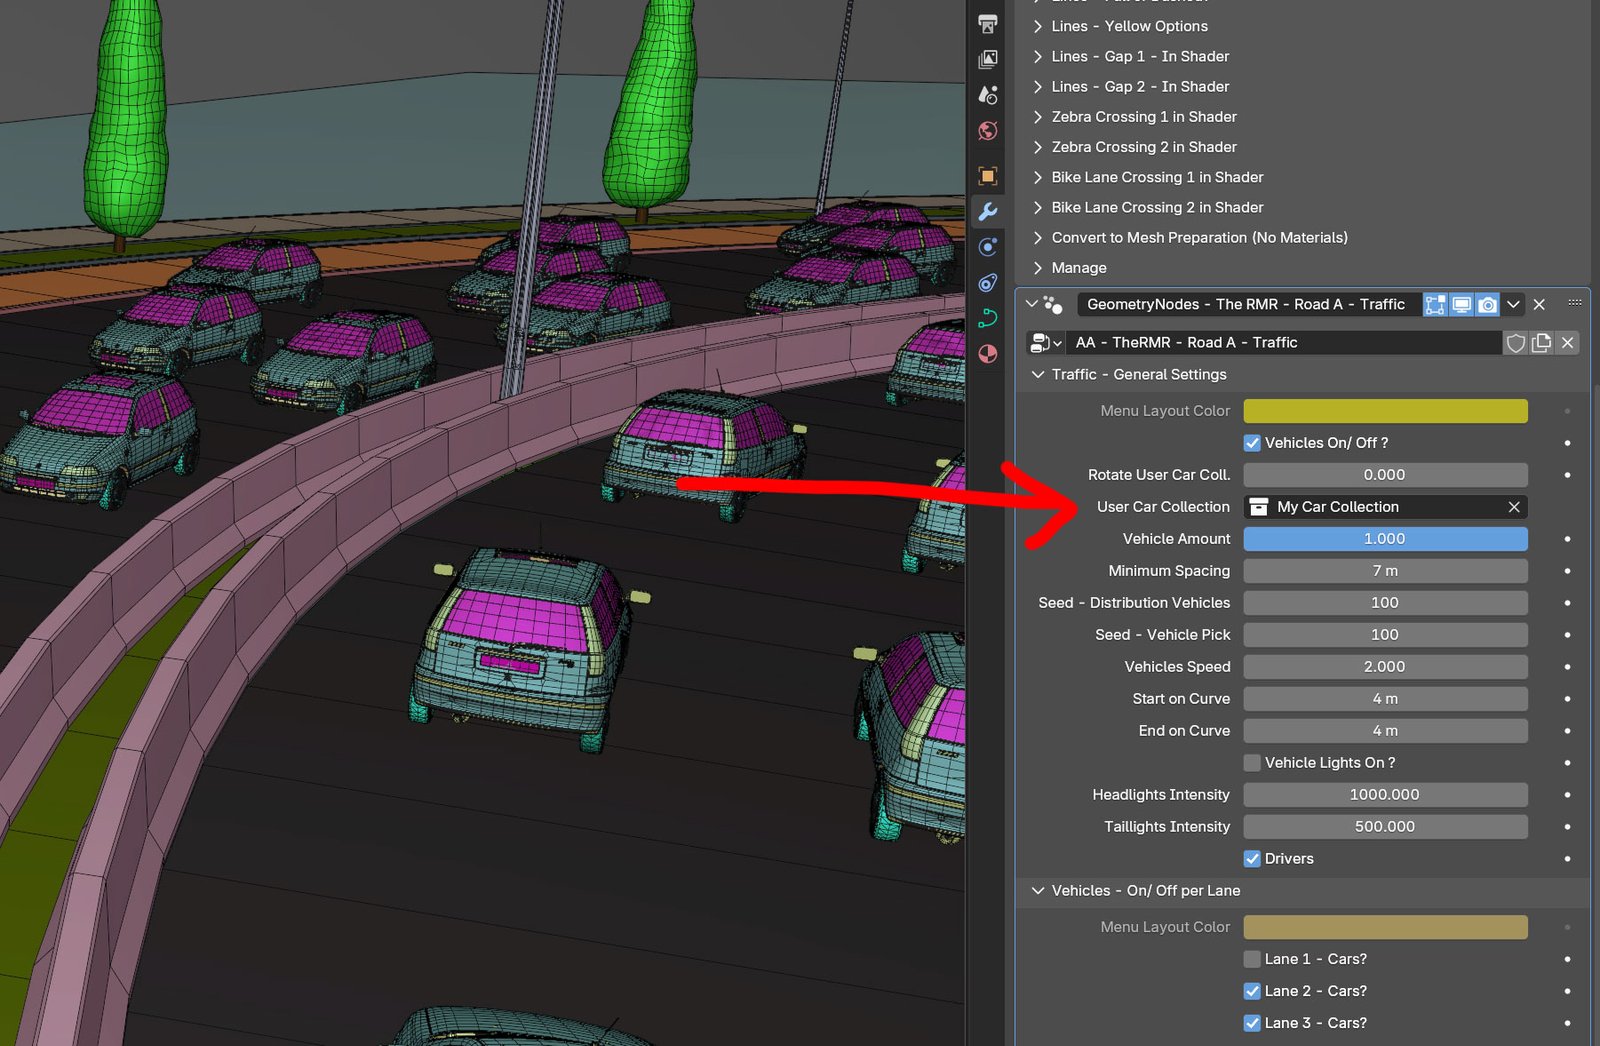
1. In the Modifier panel, go to the "Cars - General Settings" section and look for the "User Car Collection" field.
2. Select the car collection you created.
I selected my own collection of cars, but the cars have the wrong rotation.
Solution 1
- Ensure all your cars are oriented with their front side facing the same direction. Also make sure your cars are sized correctly.
- Select all your cars, then press CTRL + A (CMD + A on a Mac), and choose Apply -> Rotation & Scale from the menu.
- In the N panel, under 'Item', the three rotation values should now be set to 0, and the scale values to 1.00
Solution 2
If all your cars are facing the same direction, but not the correct direction, do the following:
- In the Modifier panel, go to the "Cars - General" panel.
- Find "Rotate User Car Coll." and change the value to rotate your cars in the correct direction.
I've added my own vehicle collection. Can I make the wheels rotate?
Yes, you can absolutely do this. However, since your custom vehicles are not part of The Roads Must Roll, I cannot take responsibility for how well this works with your setup.
That said, there are undoubtedly several ways to make your vehicle's wheels rotate.
I've created a mini tutorial for you, showcasing one method I came up with using Geometry Nodes.
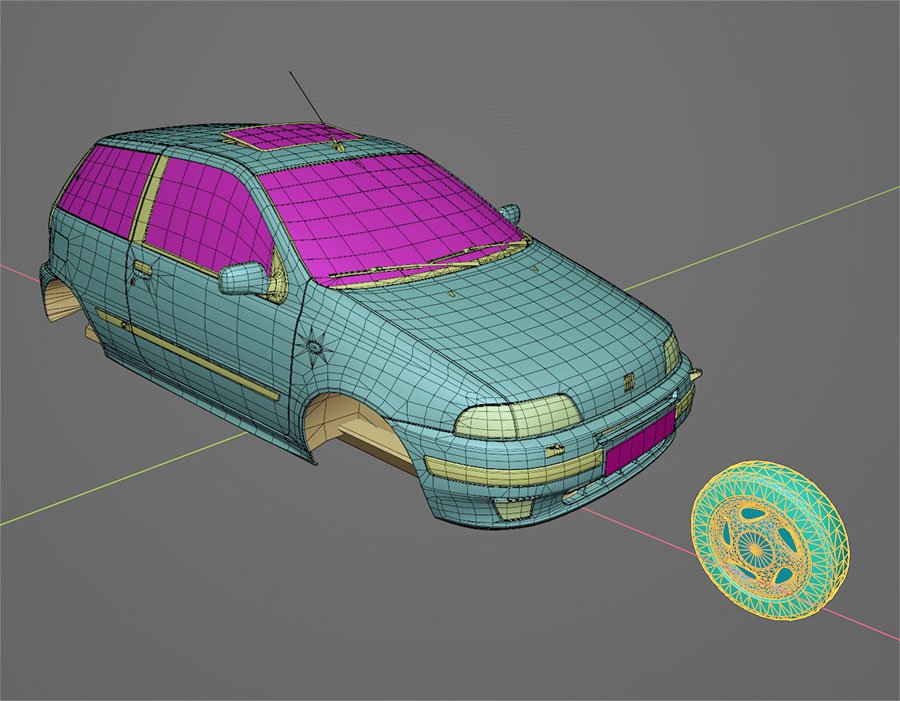
Step 1: Prepare the Vehicle Model
-
-
The vehicle body
-
A single wheel
-
Step 2: Organize the Scene
-
Move the wheel object to a different location next to the vehicle (its position in the scene doesn't matter).
-
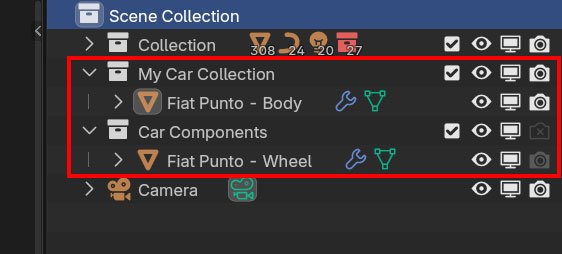
Create two collections:
-
Place the vehicle body in a collection named "My Vehicle Collection".
-
Place the wheel in a collection named "Vehicle Components".
Step 3: Add Geometry Nodes
-
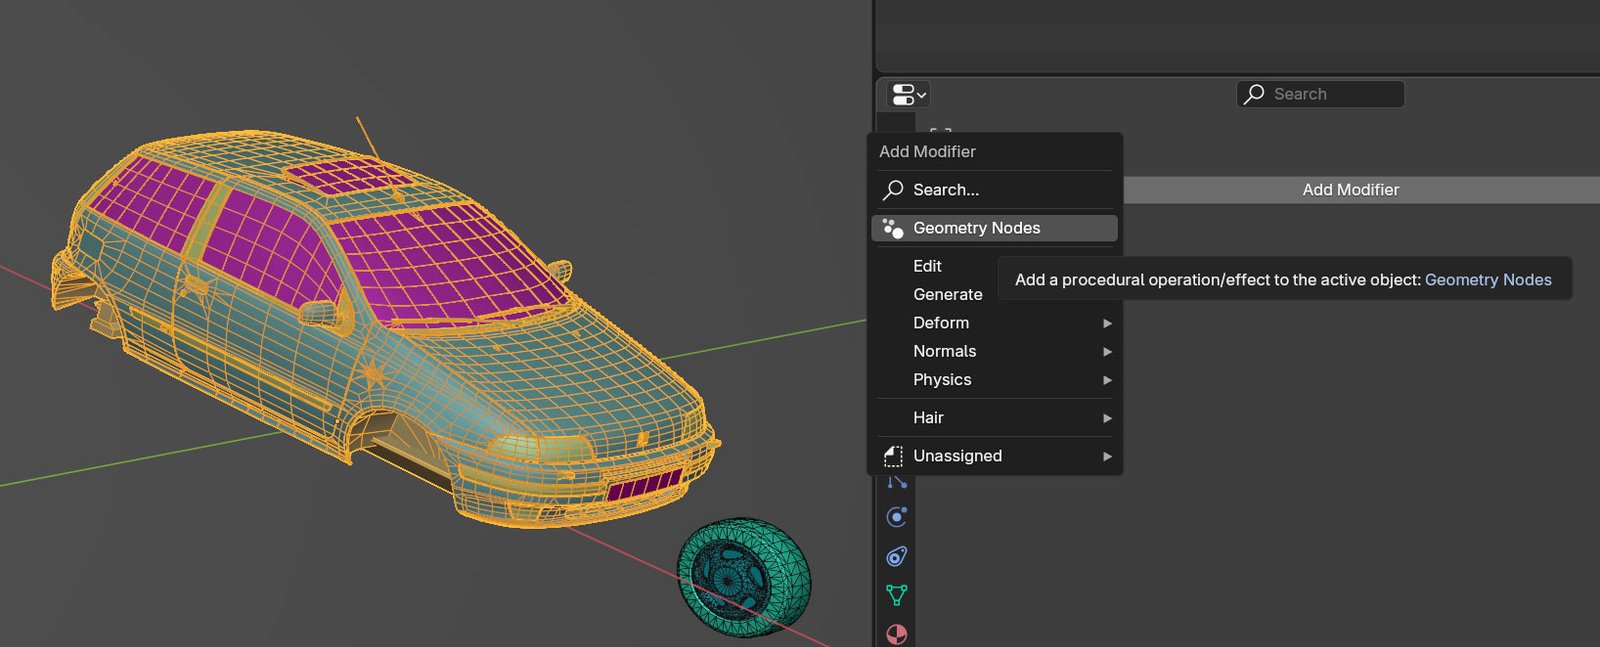
Select the vehicle body object.
-
In the Modifier panel, add a new Geometry Nodes modifier.
-
Open a new editor area and change it to Geometry Nodes Editor.
-
Recreate the Geometry Nodes setup shown in the image below. (Click this link for a larger version of the image.)
-
In the setup, adjust the position of the wheels using the four "Transform Geometry" nodes.
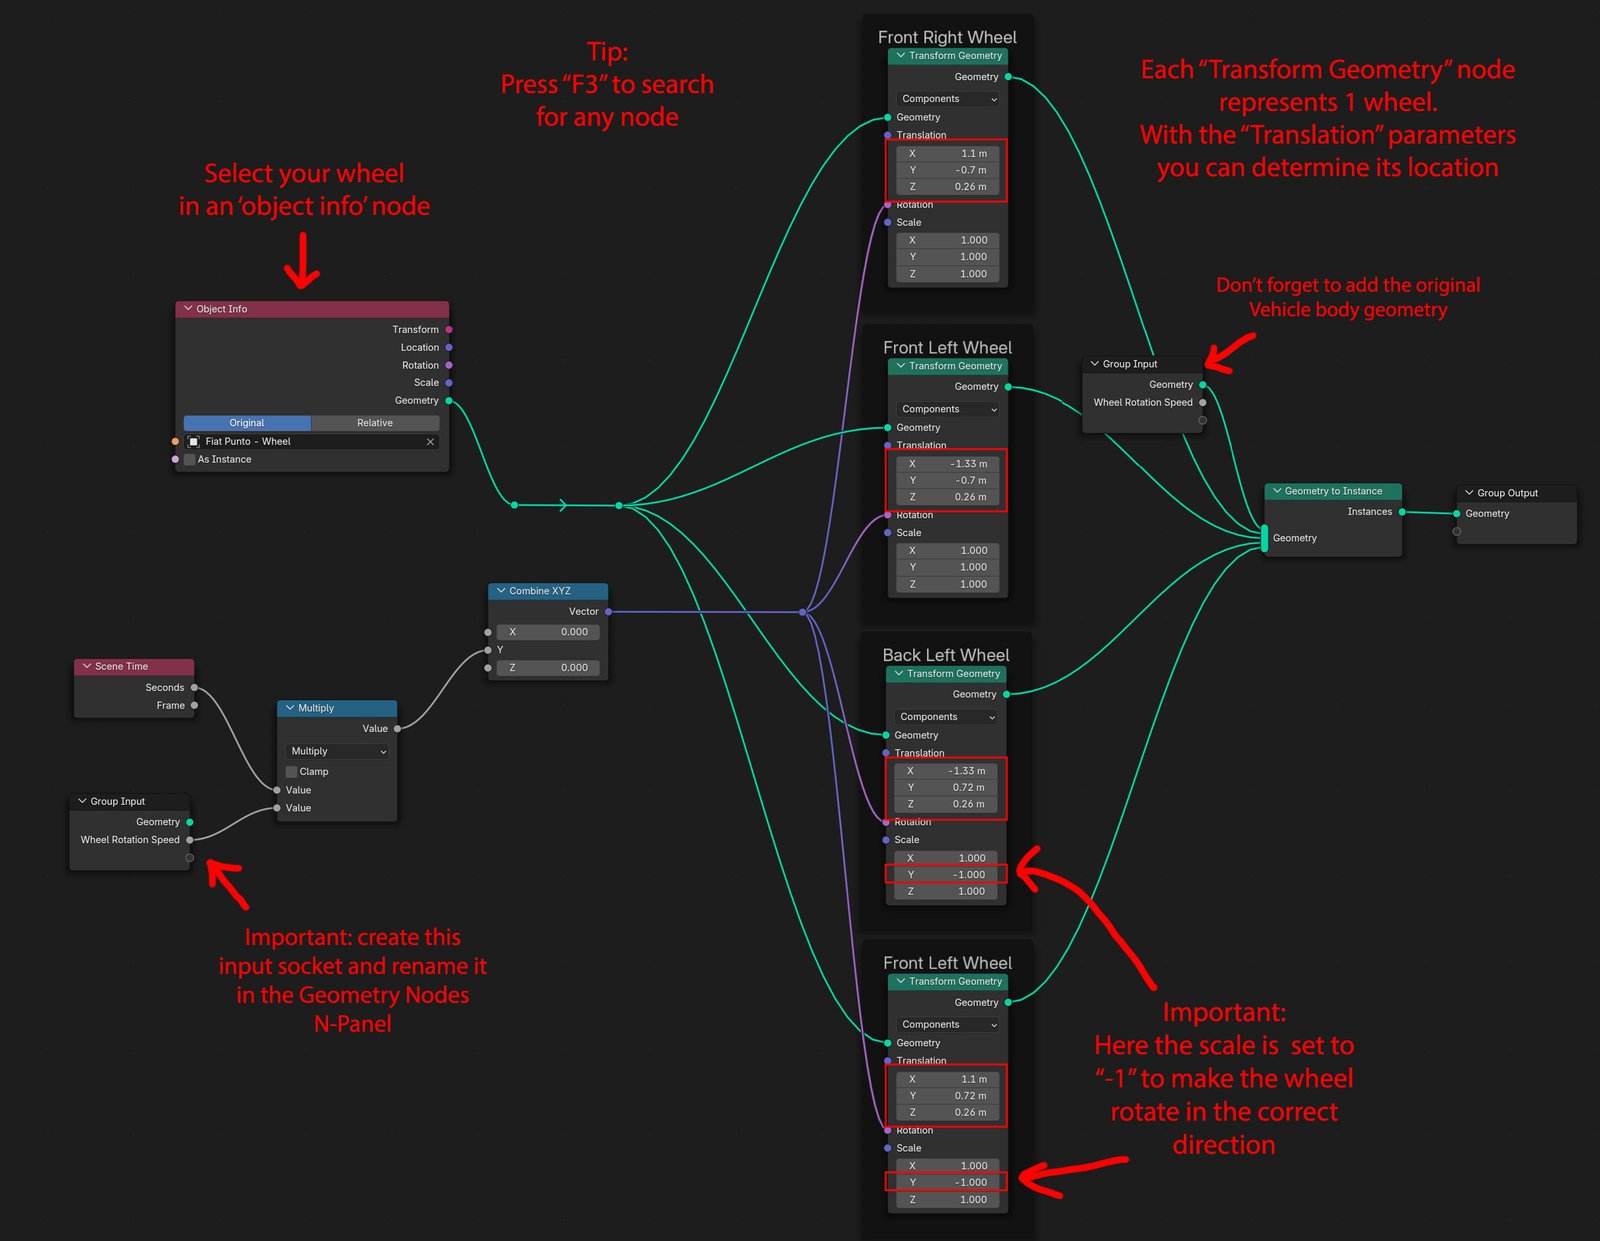
Step 4: Control Wheel Rotation
-
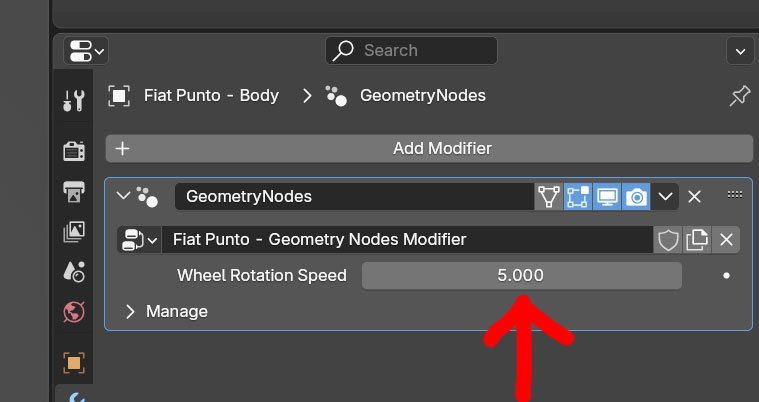
In the modifier panel, you’ll find an input called "Wheel Rotation Speed".
-
This controls how fast the wheels spin.
-
To animate the rotation speed, hover your cursor over the input and press
Ito insert keyframes.
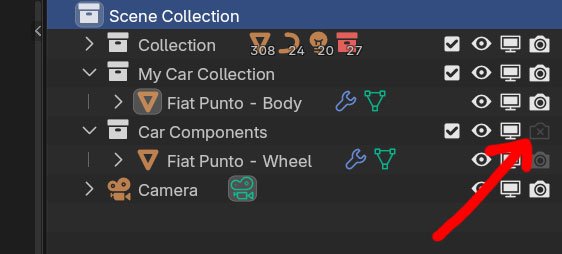
Step 5: Link to Road Traffic System
-
Select your road object and go to its Modifier panel.
-
In the "Road A - Traffic" modifier:
-
Locate the field "User Car Collection" and choose "My Vehicle Collection".
Done!
Mesh & Export Questions
Can I convert the roads to a mesh?
Yes, but there are a few limitations.
The following material elements will currently not convert:
- The white lines on the asphalt when they are part of the asphalt material
- The white lines on the parking lanes
- Bike lanes texture mapping
- Zebra and bike lane crossings in the shader
To fix this, do the following:
1. Select the road
2. In the modifier panel, go to the following panel: 'Lines - General'.
Now, choose 'Lines as Geometry'.

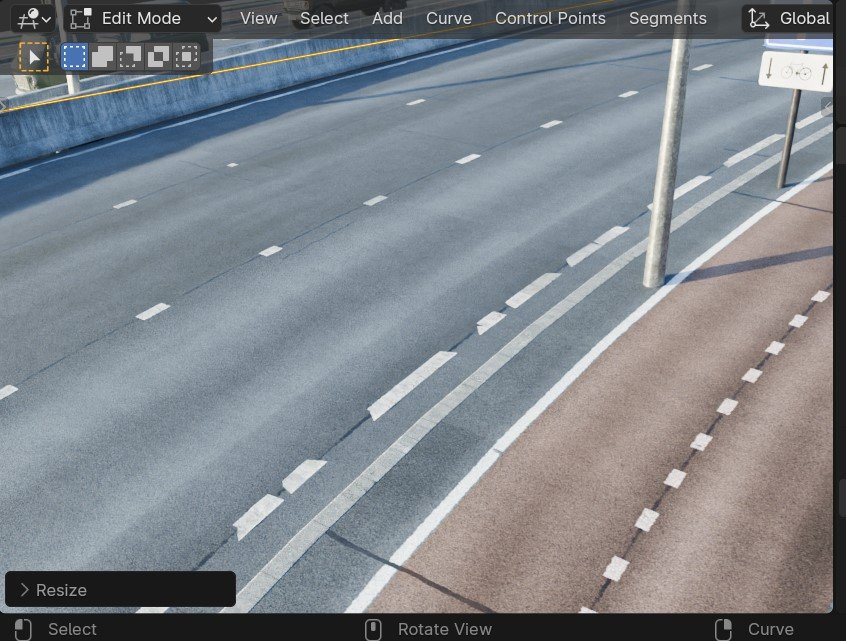
This way you will still be able to see the white lines on the road as a mesh. Attention: this will not be applied on the white lines on parking lanes, bike paths and zebra and bike crossings. The white lines there will stay a part of the materials.
3. When the road changes direction and goes up or down at the same time, the lines may 'disappear' under the surface of the asphalt.
You can counteract this by playing with 3 settings:
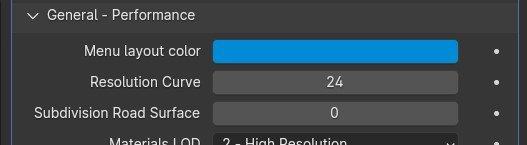
Under the 'General - Performance' panel:
- Increase the resolution of the curve
- Increase the subdivision of the road surface
Important: don't change these settings too much, as this also increases the number of polygons in the final mesh
Under the 'Lines - General' panel:
- Adjust the height of the lines as geometry

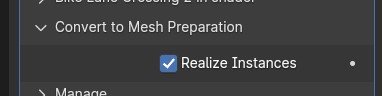
4. In the modifier panel, go to the bottom of the list and open the "Convert to Mesh Preparation" panel. Check "Realize Instances"
Please note: if multiple modifiers are applied, do this to all the modifiers (for example the traffic modifier).
5. Right click on your road in the 3D viewport and select 'Convert To > Mesh'
Your road will now be a mesh.
Can I export the roads to another software package?
Yes, but with a limitation: the mesh will probably transfer correctly, but the materials and UV mapping won’t.
The Roads Must Roll uses complex procedural materials that can only be read by Blender.
First, follow the method described in the question above to convert the road to a mesh, then export the file in your desired format.
For example, for Unreal Engine, you would export it as an .fbx file.
I can not give support for any other software then Blender.
Traffic Intersection Questions
How do I import a preset traffic junction so that I can still edit the individual elements?
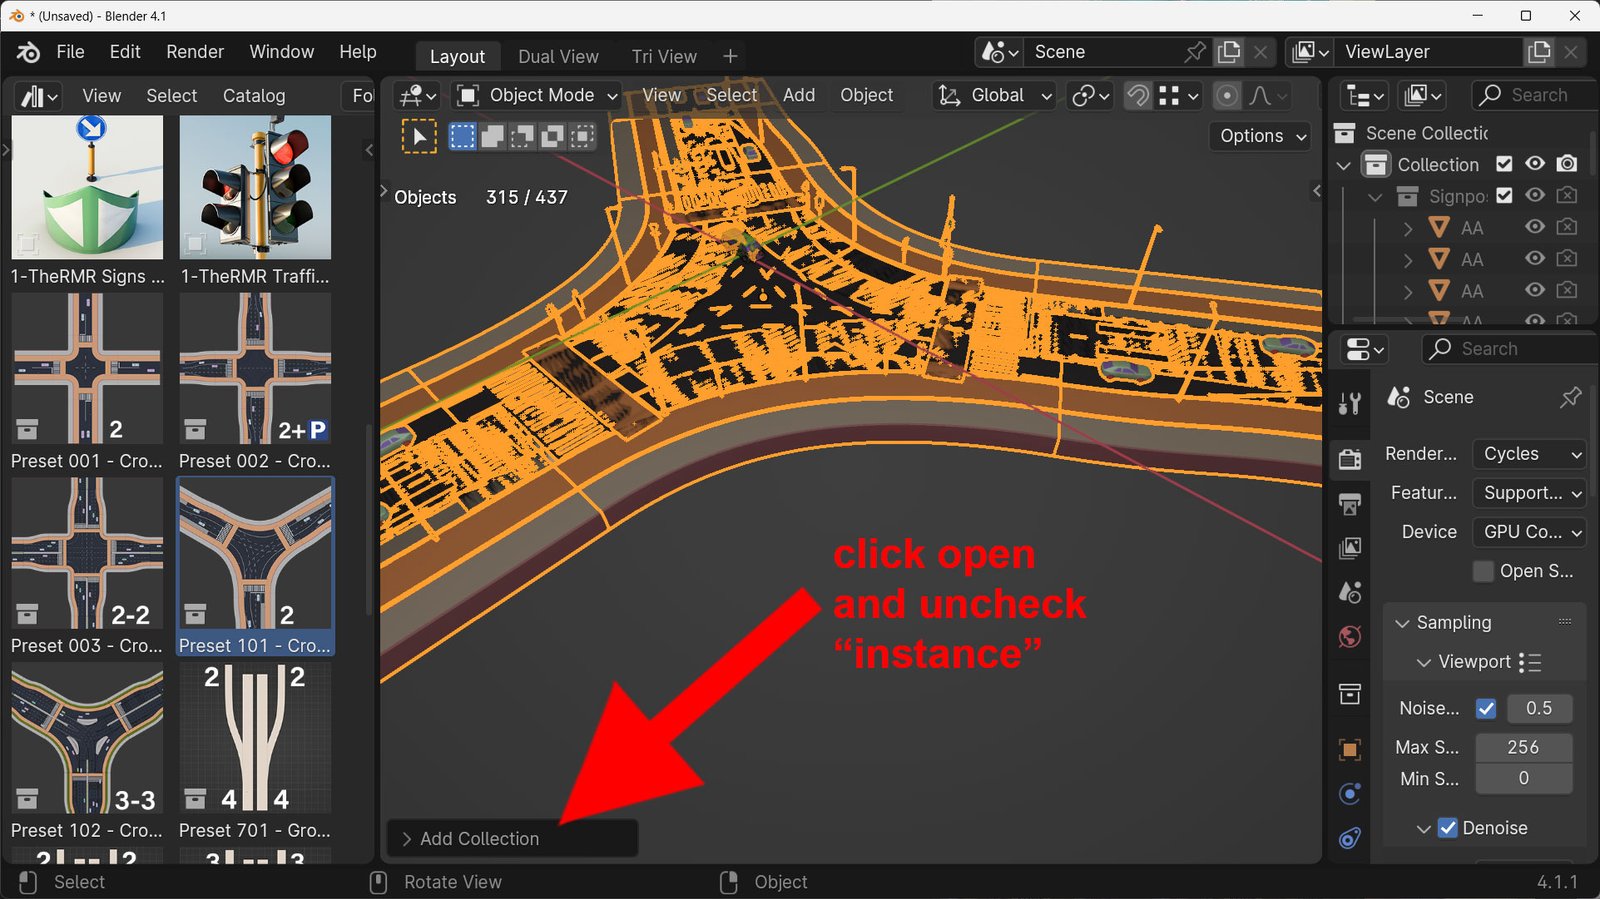
1. Drag the preset thumbnail into your 3D viewport.
2. At the bottom left in the 3D viewport a collapsed pop-up window appears with the title 'Add Collection'.
3. Click this window open and uncheck 'instance'. You will now be able to edit the individual objects in the collection.
_
Are traffic intersections automatically created?
Other Questions
Can I render with EEVEE?
The Roads Must Roll is designed to be used with the Cycles render engine.
EEVEE is not supported.
Since the 'Material Preview' mode in the 3D viewport relies on the EEVEE render engine, it’s not supported at this time.
How can I apply the main road system to a Bezier curve?
1. If you have not already done so: import the main road modifier from the Asset browser
2. Create a Bezier curve that is large enough to create a road (apply the scale with 'CTRL + A' if necessary)
3. Select your Bezier curve, go to the modifier panel and click on 'Add Modifier' > 'Geometry Nodes'
4. Click on the Nodetree icon next tot the button that says 'new' and select 'AA - TheRMR - Road A - Main'
5. Don't forget to add the traffic modifier as well: Click 'Add Modifier' > 'Geometry Nodes' again, then select 'AA - TheRMR - Road A - Traffic'. This modifier should be in the second position in the modifier panel.
6. The main road system is now applied to your Bezier Curve
Can I apply motion blur to my render or animation?
Yes! From The Roads Must Roll Version 1.4, this is possible.
You can add it in two ways:
-
By enabling it in the render properties.
-
By adding it in the compositor.
In my tests, it seems to render faster when applied directly in the render properties, but results may vary. I recommend doing a test first.
Important! For Blender versions before 4.4, do not enable 'Persistent Data' when using motion blur, as there is a known Blender bug.
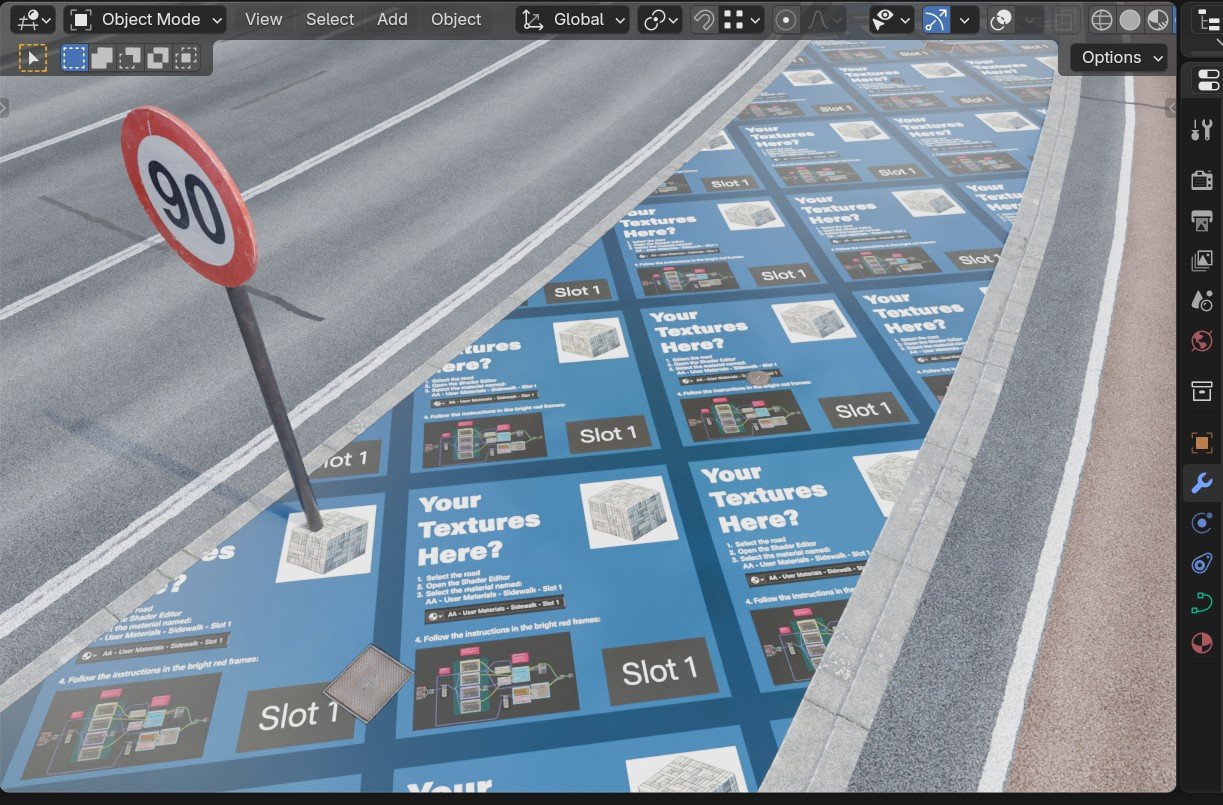
Can I use my own textures for the materials?
Yes, you can!
- Go to one of the 'Materials' panels in the Modifier panel.
- Select a 'User Material' slot from the dropdown menu.
- Enable 'Rendered' mode as the 3D viewport shading.
- Check the part where you changed the material in the 3D viewport (e.g., sidewalk pavement).
- You will see a template texture with instructions on how to place your own textures in this specific 'User Material' slot.